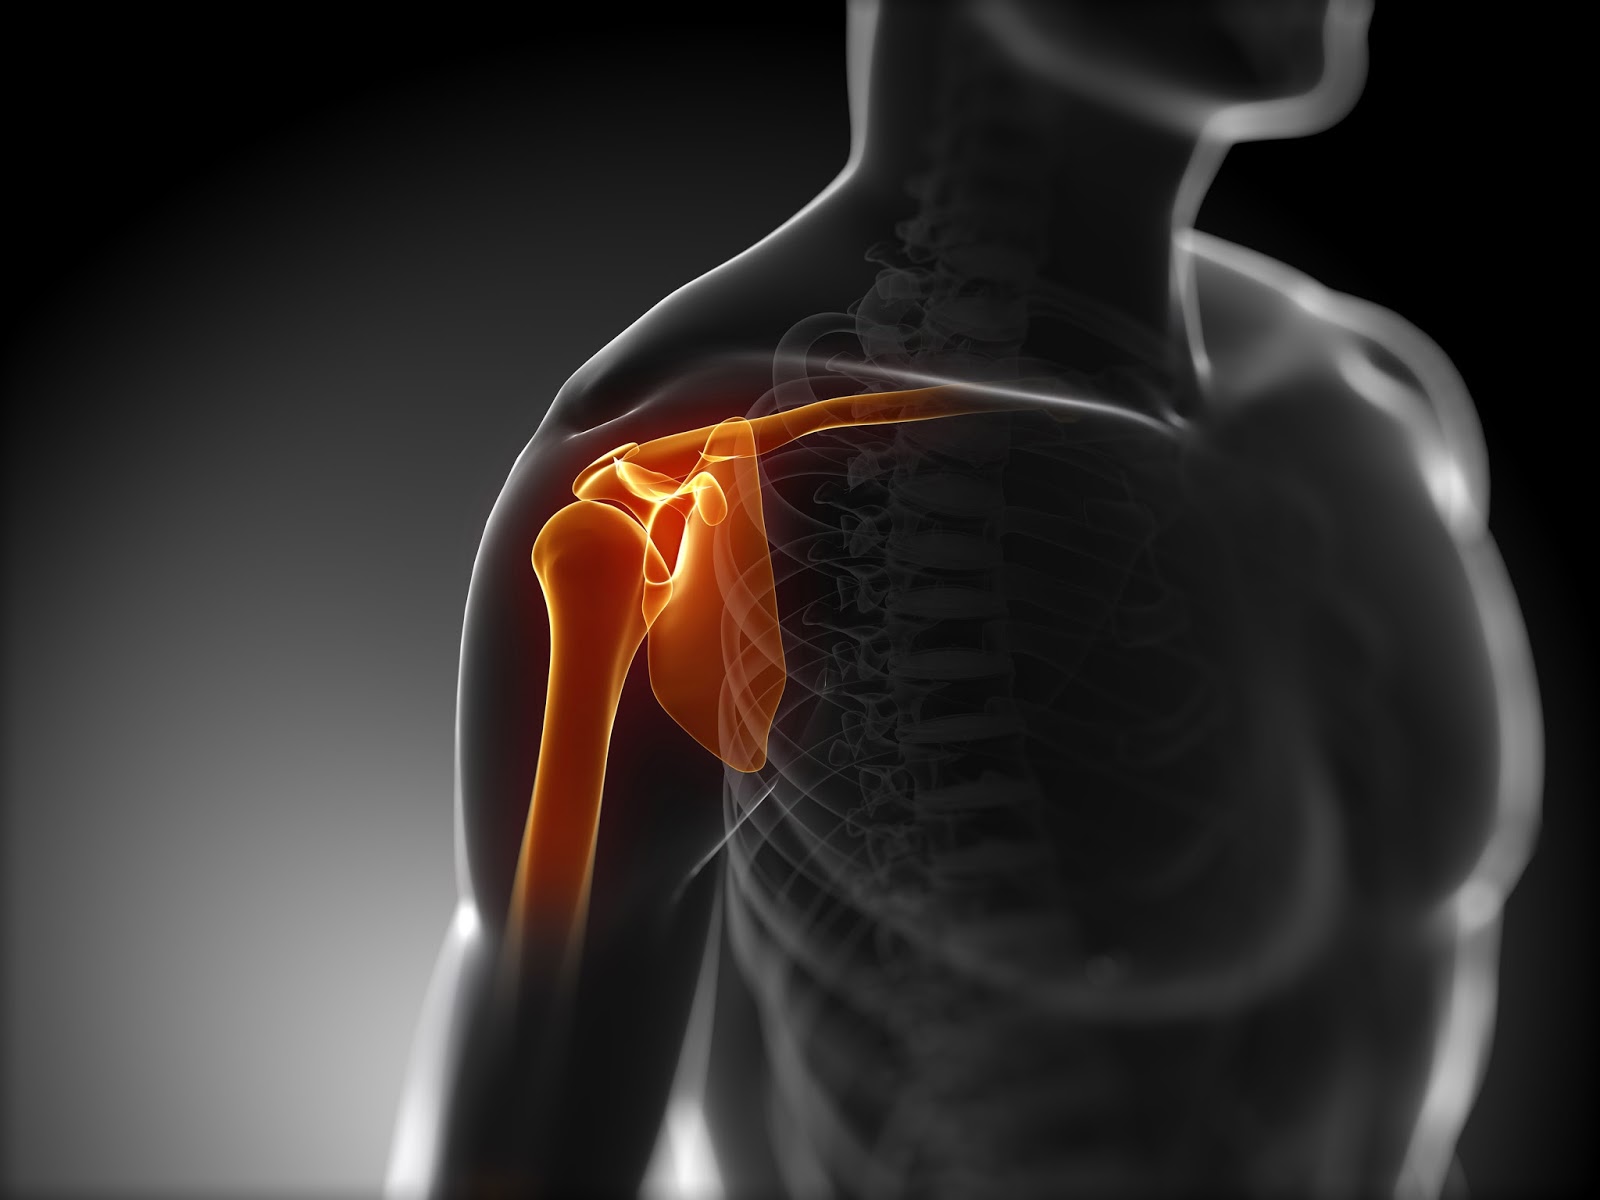
Showing posts with label Injury. Show all posts

Friday, March 16, 2018

Ice Age: Rethinking Icing Injuries and Sore Muscles


I remember when I went to the nurse in high school for a medley of ailments, and it seemed like no matter what the symptom was, a pack of ice was the associated prescription. Headache? Put ice on it. Muscle pain? Put ice on it. The building was on fire? Throw ice on it. Okay, the last one was a pretty lame joke, but somehow ice became a panacea in my nurse's eyes. It seems that in the sport and exercise world, such is also the case.

Ice Baths for Recovery

I just started watching Game of Thrones,
and I couldn't resist using this meme...
The most common use of ice that I hear people tout is its recovery healing powers. Are torturous ice baths as effective as we make them out to be?

We have evidence of the early Egyptians using early forms of cryotherapy in 2,500 BCE to treat a medley of ailments. Fast forward to 2018 and you see people immersing themselves into futuristic-looking cryotherapy chambers filled with liquid nitrogen. As you can imagine, extensive research on the subject has been done since ancient Egyptian times.

Now, one study done by Fonda and Sarabon (2013) did find that participants who utilized whole body cryotherapy reported feeling less sore than those with no intervention. While this is more qualitative rather than quantitative evidence, it does show the potential for a decrease in the perception of DOMS with cold immersion.

Hausswirth et. al. tested runners and also found a reduction in pain and subjective fatigue 24 and 48 hours after their runs in participants using cryotherapy chambers. While this is also a qualitative measurement, researchers also found an increase in strength when compared with the control group (2011).

Contrarily, Costello et. al. measured MVC (maximal voluntary contraction of a muscle) 24 hours after an eccentric exercise protocol and found no significant differences in muscle soreness in participants who were immersed in -110° C temperatures and those who weren't immersed (2012). 

Overall, the current body of research does seem to suggest that cold immersion can help reduce subjective measurements of fatigue and soreness in athletic populations, but the verdict is still mixed as far as I'm concerned. Many of the measurable, physiological markers of recovery were unchanged, but the participants simply reported feeling better. My thought process is that a lot of the attributed markers of recovery are due to a placebo effect. Effectively, if you feel like an ice bath helps you feel like you're being active in the recovery process, then keep on as you were. It may not be efficacious, but it's worth a try!

Ice Baths for Treating Injury

Going back to my high school nurse who would use ice as a cure-all, many people still assume that icing is the best protocol for soft tissue injuries. Let me start by saying that ice works as an anti-inflammatory and also a vasoconstrictor (meaning your blood vessels constrict). The downside here, is that we societally regard inflammation as a negative thing, when it is in fact your body's line of defense. Inflammation is necessary to jumpstart the healing process. The more blood flow you get to an area, the quicker the repairing process can start. Gary Reinl, author of the book "Iced" which covers this topic more in-depth, notes "the inflammatory cells remove debris and recruit cytokines and other growth factors toward the injury site." As such, swelling and inflammation are not symptoms to fear or reduce in this case. He goes on to say, "In a healthy healing process, a proliferative phase consisting of a mixture of inflammatory cells and fibroblasts naturally follows the inflammatory phase. The fibroblasts build a new extracellular matrix and persist into the final phase of repair, the maturation phase, where, if all goes well, functional tissue is laid down. The key point is that each phase of repair is necessary for the subsequent phase."


Additionally, the University of Pittsburgh Medical Center (my alma mater) noted that "…ice may not be the best treatment for aching muscles — in fact, it could even be detrimental to recovery" (2011). The British Journal of Medicine reached a similar conclusion, stating that "ice is commonly used after acute muscle strains but there are no clinical studies of its effectiveness" (2012).

Summing it All Up

Icing injuries has become a staple in workout and recovery protocols for people all across the globe for ages. As it turns out, the effectiveness as icing for both decreasing muscle soreness/damage and for aiding in the healing process of an injury seems to be unfounded. The body of research denouncing the usage of ice on both accounts seems to outweigh the papers that support its application.

I personally don't use ice in either instance, and I believe that rest, sleep and proper nutrition can be some of the most effective recovery strategies! Next time you go to jump into the ice bath or wrap an injury in a bag of ice, ask yourself why, and decide whether or not it's actually going to help you or potentially hinder you.


Friday, September 8, 2017

Fixing Your Achy Wrists


Do you experience pain in your wrists while doing exercises like bench presses or planks? If so, then read on!

As I've mentioned 1,000 times (and you're probably sick of me saying it already), we always have to look distally (farther away) from the area in question. Think of your entire arms as a train. If the shoulder isn't working properly, you bet that you're gonna have elbow and wrist problems too. Take a look at the photo on the right from Thomas Myers' Anatomy Trains. You can see here that the pecs of the chest will influence the structures all of the way down to the fingers.

The number one complaint I hear from clients when doing the front squat is that their wrists hurt them. While the wrist pain is the symptom, the cause typically arises with poor shoulder mobility. If your front rack position is sub-par, your wrists now have to bear the brunt of that load. The lower your elbows are, the more wrist extension you need to compensate. In this instance, you need to work on opening up the pecs and lats to ease the stress on your wrists.

Because of this horrendous shoulder mobility, his wrists suffer.

I see similar problems arise in pressing movements. In the bench press or the overhead press, clients occasionally lack the necessary strength in their forearm flexors, so they fall into a hyperextended wrist position throughout the lift. A more "neutral" wrist position can save them a lot of discomfort. In these cases, the problem might not be mobility, but grip strength. I would have these people do exercises like hangs from the pull-up bar, plate pinches, or farmer walks to combat this. Sometimes, cueing alone can also go a long way to correct this issue.

This image from Liftbigeatbig explains different wrist positions. We never
want significant extension in pressing movements.
Ultimately, if you feel pain in your wrists you have to check out how your shoulders are moving to properly assess the issue. Shoulder instability can manifest itself in a variety of different ways. Continuing to address your wrist alone will have little to no effect. I see a lot of people working to stretch their forearms to alleviate wrist pain, but rarely do they address other possible contributing factors like shoulder stability or grip strength. Global corrections will stimulate an entire chain reaction of positive effects.

Thursday, June 22, 2017

The 4 Exercises that Your Shoulders Hate


It is common for a lifter to seek boulder shoulder status. While having protruding, rounded shoulders certainly looks nice, the shoulders are very vulnerable to injury. The demands of a sedentary, desk-ridden society already makes our shoulders unhappy, and if you translate this dysfunction into the gym, you're gonna have a bad time.

I have dealt with my own shoulder issues in the past, and I know just how aggravating it can be to have to modify workouts or avoid certain movements. Ultimately, I had to learn the hard way what exercises provoked my shoulder pain. Many common-place shoulder exercises can be effective for deltoid and pectoralis hypertrophy, but they also promote instability and compensation. For both myself and my clients, there are four main exercises that I avoid for the sake of sparing their shoulders:
  1. Pec flies. Regardless of whether you're using cables, dumbbells, or even the pec-deck machine, you're most likely better off without them. With this movement, many lifters tend to go well beyond the necessary range of motion to isolate the pectoralis muscles in transverse shoulder flexion. You also run the risk of sufficiently irritating your biceps tendons. Instead, they end up stretching the hell out of their anterior deltoids and forcing their shoulders into a yucky internally rotated position that makes me cringe. For chest development, I prefer to have clients do reverse grip bench press, neutral grip dumbbell bench press (with a slow eccentric focus), and Spoon presses. If you're hell-bent on keeping pec flies in your workout routine, try to minimize the range of motion so that your arms only go slightly above parallel, and make sure you maintain a slight bend in your elbows.
  2. Behind-the-neck lat pull-downs. I've addressed my feelings about behind-the-neck exercises previously, so to save you from a redundant rant, I'll give you the abridged version: these movements (especially in lat pull-downs) encourage you into flexed cervical spine and often reinforce poor shoulder movement. Very few people possess adequate shoulder and thoracic mobility to perform these. If you really want wings, stay away from these. Instead, try rowing variations, pull-ups (you add weight or go chest-to-bar if you want a greater challenge), straight arm pull-downs, and maybe the occasional Red Bull. (I couldn't resist...)
    Yikes!
  3. Box dips. In a recent Instagram video, I mentioned that I stray away from programming dips on a bench or a box. Effectively, this variation places unnecessary stress on the anterior capsule and tendons of the shoulder. To perform these, a client must flare the elbows out excessively, while the shoulder again shifts into a precarious position. You will see this as well on bar dips, but to a lesser degree, because the athlete's shoulder and elbows are closer to his center of mass. The ideal way to do dips, in my opinion, though, is on the rings. The rings force the athlete to properly adduct his shoulder, and his arms are closest to his center of mass (thus resulting in a more mechanically advantageous position. If you're currently unable to do ring dips, stick to push-ups on the rings, and then slowly progress to a full ring dip.
  4. Upright rows. I'm sure you've heard trainers shun this exercise before. While I think it can be helpful for developing the shoulders for the right client, there are always other options. I've found that they cause more harm than good for most people, as usually the anterior deltoids are the strongest part of the shoulder. Instead, many people would benefit from training the posterior or rear deltoids with back flies to balance out the omnipresent imbalance from front to back.
In general, gym goers can benefit from fewer pushing exercises and more pulling exercises. I usually propose a 2:1 ratio for upper body pulling:pushing days. By this, I mean that you should only spend about one day per week doing bench press, push press, etc. (or at least with those movements as your primary focus), and two days with a pulling/rowing focus. The anterior deltoids and pectoralis tend to run the show (especially in men), and, thus, can cause a lot of pathologies and mobility restrictions. Your rhomboids, rear deltoids, lats, and lower trapezius can always benefit from some more love and attention.

There are plenty of safe and effective exercises that will still give you strong shoulders, such as those that I've listed in this article. You can be smart about your upper body training and avoid nagging injuries that will keep you sidelined for weeks at-a-time. Make these changes to your routine, and your shoulders will be happier in the long run!

Friday, April 28, 2017

Debunking the Myth of the Vastus Medialis


The quadriceps complex is comprised of four main muscles: the rectus femoris, the vastus intermedius, the vastus lateralis, and the vastus medialis (which seems to have become the most buzzworthy muscle of the four). The vastus medialis obliquus (commonly referred to as the VMO) is the middle “tear drop” shaped muscle of the quadriceps complex. Both personal trainers and physical therapists often blame generic knee pain on this guy being weak, but the literature just does not seem to substantiate that concept. If a doctor or physiotherapist has ever told you that you need to strengthen your vastus medialis, then he or she is spouting off outdated and false information.

I have seen many an article claiming that one can “isolate” the vastus medialis, or emphasize its activation, by raising the heels in a squat, by narrowing one’s squat stance, or by doing some wild exercises. These exercises are frequently prescribed to individuals with patellar tendinopathy, patellar tracking, or post-op ACL tear patients. While these concepts sound excellent in theory, the data has shown that those ideas are effectively no more than broscience. The vastus medialis and lateralis muscles contract together, and no amount of heel raise, hip external rotation, or close-stance squats will change that.

Do decline squats increase VMO activation?

The first exercise myth about the VMO is that raising the heels will increase its activation in the squat. While using Olympic lifting shoes or standing on a board will undoubtedly increase total quadriceps recruitment, as your torso will be more upright, the vastus medialis receives no preferential treatment. Rather, the vastus lateralis and medialis simultaneously work harder to squat when the heels are elevated. Similarly, the high bar squat is more quad-dominant than a powerlifting low-bar squat, and a front squat is the most quad-dominant of the three.

Does squat depth influence VMO activation?

When analyzing the angles at which the vastus medialis and lateralis are most active, Lee et. al. found that 90° or less of knee flexion was optimal. Essentially, deeper squats allow for greater vastus medialis and vastus lateralis contraction. Again, both muscles are being targeted in this instance, so the VMO is working harder, but so too is the vastus lateralis.

The other take home here is that if you want quads of the Gods, you can’t skimp on your depth. If you have to ask someone if you’re going low enough, you’re probably not! If mobility is an issue for you, then you should seek the advice of a qualified professional and dedicate time at the end of your sessions to improving your bottom position.

What about narrow-stance squats?

None of the research to date indicates that squatting with a narrow stance impacts the vastus medialis to a higher degree. In fact, it doesn’t appear that it changes the activation in any of the quadriceps muscles at all. I’m not quite sure where this myth arose, but it seems to be contradicted by the literature.

Squatting with your feet close together won't increase VMO activation,
but it may result in faulty mechanics and potential for hip impingement.
One study with Paoli et. al. looked at the EMG in 8 different thigh muscles, measuring activity in three different squatting widths and three different intensities (no load, 30% of 1 RM, and 70% of 1 RM). They tested both quadriceps and hamstrings muscles, and there was effectively no statistical difference in any of the muscles except for the gluteus maximus. No matter how close the lifters stances, their quadriceps muscles (vastus medialis included) were no more or less active at any intensity.

Surely foot position matters?

This is one that I have heard for years, and even believed myself for a while: trainers boast that externally rotating the feet will preferentially recruit the VMO, whereas a parallel foot position would lead to more evenly divided muscular recruitment. Unfortunately, no studies to date have confirmed this concept.

Murray et. al. tested twenty physically active adults in 4 different foot positions during a partial squat on the Power Tower machine. They found no real differences in EMG amplitude in differing levels of external/internal rotation. Similarly, Ninos and colleagues tested two varying foot positions (externally rotated and neutral) in the Olympic squat, and there was no noteworthy difference in vastus medialis activation.

The take home? If you have strong quads, you have a strong VMO.

Trainers have managed to come up with many creative circus-trick exercises for targeting the vastus medialis muscle, but while they might look exciting to try in videos, the basic foundational leg movements are all you need; squats, lunges, step-ups, and split squats will help you build strong quadriceps muscles, and, in turn, strong vastus medialis muscles. You can perform your leg extensions with your feet externally rotated all day, and you still won’t be able to isolate your medial quadriceps. Instead, just stick to those previously mentioned core movements and reap the benefits of your tree trunk legs!

Friday, May 20, 2016

Why Does Your XYZ Hurt? (Your Pain Explained)


Often times, pain in the body is associated with injury or illness of the patient. Pain is not, however, as straight forward as it may seem. There are quite a few misconceptions about what pain means, or what causes pain itself. Here are a couple facts about pain:

I want to start off by saying, just because you’re in pain, does not necessarily mean you’re injured or ill. Pain can be your body’s way of telling you that a dysfunctional pattern needs to stop. When you overuse a muscle, it’s gonna say, "hey, give me a break." As Lorimer Moseley puts it, "100% of the time, pain is a construct of the brain." Basically, this means that it is the brain sending messages of pain, not the muscles. A lot of people seek out temporary cures like cortisone shots, NSAIDs, ice baths, etc., when what they really need is some corrective exercise. This will stop the pain response in the long term by treating muscular imbalances, rather than temporarily treating the symptoms.
Mirror therapy tricks your brain to believe that the
missing limb is still attached to your body.
  • Similarly, you can feel pain on a limb that's not even yours. Yes, you read that correctly. Take, for example, the case of phantom limb pain. Patients often report feeling shooting pains in an appendage that was removed years ago. A technique called "mirror therapy" has been very effective in treating this phenomenon: "a procedure utilizing the visual recreation of movement of a lost limb by moving the intact limb in front of a mirror, has been shown to be effective in reducing [phantom limb pain]. However, the neural correlates of this effect are not known." While the exact science of phantom limb pain and its treatment is still widely a mystery, this just goes to show that pain is multifactorial and complex.

Conversely, if you’re injured, you might not necessarily experience pain. Not every torn ligament, disc herniation, etc. is symptomatic. There are people with disk herniations who experience 0 pain, and they're able to continue on with their daily activities: "On MRI examination of the lumbar spine, many people without back pain have disk bulges or protrusions... Given the high prevalence of these findings and of back pain, the discovery by MRI of bulges or protrusions in people with low back pain may frequently be coincidental," noted a study executed by Jensen et. al.

Your body remembers previous traumas, and “pain” pathways form in your brain. So, if you suffered from an injury a few years ago, you may experience pain in that same area without having re-injured it. Let's say, for example, you fell while you were ice skating and sprained your wrist two years ago. Now, your brain forms a negative association with ice skating. You may notice your symptoms reappearing every time you go back to the rink, even though you've long since healed.


Emotions can influence your symptoms. We can physically manifest stress in certain areas of the body. If something in your body is bothering you more than usual, consider other environmental stressors that could be contributing to the pain. Did you lose your job? Are you fighting with a friend? Neuroscientist Dr. V.S. Ramachandran puts it succinctly: "Pain is an opinion on the organism’s state of heath rather than a mere reflexive response to injury … Pain is an illusion.” This can mean that if you're upset about something, or you've convinced yourself into thinking there's something wrong, then your brain will respond accordingly by sending a pain response to the area.

Treating the pain symptoms (i.e. taking NSAIDs, icing, etc.) does not necessarily treat the cause of the problem. These will work as short-term solutions. See a doctor, physical therapist, or a chiropractor to figure out the source of the pain before you try to treat it on your own.
There are a million different factors that contribute to pain. Here are a few listed by Dr. Kathy Dooley:
  1. Environment
  2. Memory programming of pain (i.e., cerebral programming)
  3. Systemic inflammation
  4. Pain receptor irritation
  5. Heightened awareness, due to neurotransmitter activity/inactivity (i.e., drug exposure, depression)
  6. Circulatory issues (i.e., blood stasis)
  7. Fatigue and energy deficiency
  8. Improper hydration/dehydration
  9. Psycho-social components (i.e., your back hurts because you hate your job)
The moral of this article is thus: don’t just lump “pain” into one category. Pain does not necessarily mean something is horribly wrong, but you do need to look at why the pain is occurring in the first place, if you want to eliminate it in the long term. Be your own detective.


Friday, January 29, 2016

Channel Your Inner Athlete with Agility Training


Whether you're an athlete, or just someone who wants to get in shape, fitness is, to me, about adaptability. Our workouts should help us become more resilient to the world around us. A potentially injurious situation can be avoided when you have the adequate strength and stability. Agility is one such trait that prepares us better for multiplanar movement.

This little guy is quite the athlete...

By definition, the word "agility" connotes changing directions with ease. An athlete who is particularly agile can more easily bob and weave around his opponents on the field. For others, someone who is more agile can avoid injuries like knee and ankle sprains, or broken bones. Adding more agility work into your training can improve overall athletic skills and minimize traumatic injuries.

Sports require that an athlete can cut corners, accelerate and decelerate quickly. Football, soccer, and tennis are just a few sports where agility is exceptionally helpful. Successful athletes need to move well in all three planes of motion (as depicted in the photo on the left). Developing movement in the transverse plane is especially important in sport.

One study on male college students found that agility training increased muscular power. "To enhance explosive muscle power and dynamic athletic performance, complex agility training can be used. Therefore, in addition to the well known training methods such as resistance training and plyometric training, strength and conditioning professionals may efficiently incorporate agility training into an overall conditioning programme of athletes striving to achieve a high level of explosive leg power and dynamic athletic performance." In order to excel in any sport, developing your agility is a must!

Injury prevention routines ensure that athletes don't miss out on weeks or months of training. Agility protocols are effective in avoiding contact injuries like ACL or MCL tears, which could potentially keep you benched for an entire season. "Multifaceted intervention studies that have included balance training along with jumping, landing and agility exercises have resulted in a significant decrease in ankle or knee injuries in team handball, volleyball and recreational athletes."

The benefits of agility training are not limited to the athletic population. For example, Liu-Ambrose et. al. performed a study on "98 women aged 75–85 years with low bone mass." The goal of the study was to improve balance, and hopefully reduce the incidence of falling, in geriatric women who suffer from osteopenia (which precedes osteoporosis). The ladies were either assigned to do resistance training, stretching, or agility training. "Both resistance training and agility training significantly improved balance confidence by 6% from baseline after 13 weeks ... This change in balance confidence was significantly correlated with change in general physical function." Once these women developed the requisite strength and agility, they were able to improve proprioception (limb awareness), and, thus, find a new sense of confidence in balancing-related tasks.

If you're looking for some exercise ideas to help you become more agile, here are a few of my favorites:
  1. Diagonal sprints
  2. High knee carioca (ideal for warm-ups)
  3. SAQ ladder drills
  4. T-drill or 4 cone drill
  5. Speed skaters
  6. Hurdle drills
  7. Rebound jumps
  8. Pro agility drill
Overall, shuffling, back pedaling, twisting, and cutting movements are great tools to improve your agility level.

Becoming more agile can minimize your risk of falling, while simultaneously maximizing your athletic performance.

Friday, September 18, 2015

Sturdy Shoulders (How to Spare Your Shoulders from Injury)


I'd say nearly every person I've trained has, during an assessment, mentioned a previous shoulder injury. Even I have suffered from the plague that is shoulder pain in the past.

The shoulder (glenohumeral) joint is the most mobile joint in the body. The ball and socket architecture allows it to move through all different planes. The downside to this excessive range of motion, however, is that, if the musculature surrounding the joint is not strong enough, injury is surely impending.

As a coach, I see two ends of the spectrum: the hypermobile (like myself), who have an abundant range of motion but lack the appropriate control overhead, and the stiff, tin men who can barely extend their elbows all of the way. Generally, men tend to fall on the latter end, while women are usually guilty of the former. Of course, there are plenty of ladies with tight shoulders, and mobile men, but this is the typical trend that I have noticed.

The ideal situation would be the middle (wo)man: someone who can achieve the positions necessary for his or her sport, but has sufficient strength as well.

Keep in mind that not all shoulder injuries are created equal. Depending where on the list of mobility you fall, your exercise prescription may need to change to cater towards your individual weaknesses. Someone who has really tight lats is not definitely going to be doing the same "prehab" as someone with weak lats.

Below, I will explain each scenario a bit more in depth, and give you some corresponding exercises to remedy those imbalances. Beware, as there are 7,000,000 clickable links coming your way for the exercise demonstrations.

Case 1: Hypermobility

The hypermobile individuals need more stability. I often find that these people  These people need to strengthen the shoulder girdle and the back (latissimus dorsi, serratus anterior, etc.)

Although these guys can seamlessly execute an overhead squat, core strength tends to be minimal in this group. Usually, this will go hand-in-hand with poor rib position during overhead movements. Therefore, we need to address the lack of midline stability first, and strengthen the rotator cuff second.

Here are some exercises that will go a long way for this population:
  1. Arm bars (progress into the Turkish Get-up)
  2. Barbell overhead carries (or single arm with a dumbbell)
  3. Barbell roll-outs
  4. Supine barbell rows
  5. Scap push-ups (or banded protraction)
  6. Deadbugs
  7. Face pulls
  8. Dumbbell serratus pull-overs (or with a barbell)
  9. Upside-down kettlebell press (or use a PVC)
Case 2: Poor Mobility


If you fit into the "incredibly tight shoulders" group, then movements like an overhead squat are completely out of the question; the rack position on a clean or a front squat is nonexistent. Most likely, these people will have limited mobility in the thoracic spine (rib cage area). The pectoralis muscles and the latissimus dorsi are excessively tight, and then the lower/middle trapezius, rhomboids, infraspinatus, teres minor will be weak.

Click to enlarge.

First, you'll want to release tight muscles like the pecs and the lats. You can also try this stretch on the foam roller or this stretch on a bench to open up those overused muscles. The next step is going to be to strengthen those weak areas I listed previously. Some of the best ways to reach achieve that are the following exercises:
  1. Y's, T's, and W's (or fall-outs on the rings)
  2. Farmer carries
  3. Cable external rotation (or with a band)
  4. Kettlebell overhead press
  5. Band tears
  6. Cable reverse flys
  7. Wall slides
  8. Forearm wall-slides
  9. Hangs from the bar (or single arm)
As you can see, the type of corrective exercises I would issue for each group is pretty drastically different from one another. Case 1 is working to stabilize the shoulder joint, whereas case 2 has a bit too much stability and needs to improve flexibility. While each exercise may add value to any workout routine, it's important to prioritize the most valuable movements, rather than trying to add 75 different correctives. Honestly, I could've added a gazillion more exercise ideas in here, but I figured it was best not to overwhelm you with even more links than I've already included!

As always, breathing will also influence the strength and stability of the shoulders, so make sure to reinforce proper breathing when you're doing these exercises, and even when you're just going about your day-to-day activities. Make some of these exercises a part of your regular routine, and you'll be well on your way to having solid shoulders resilient for any sport.


Friday, July 31, 2015

You're Injured–Now What?

At some point in nearly every athlete or active person's career, he or she will experience some injury, either major or minor. Whether you've torn a tendon or ligament, sprained a muscle, or you just have a nagging painful area that won't seem to go away, you understand how frustrating it can be when you're making a lot of progress and your body forces you to a screeching halt.

She does not look like she's having a good time.
Unless it is a traumatic injury (broken bone or a complete muscle tear), many people will just bite their tongues through the pain and continue to train normally. Perhaps they'll rest for a few days, or they'll avoid painful movements.

If you're currently suffering from some sort of issue, you're probably trying to figure out what the safest approach is that will allow you to continue to make progress towards your goals.

Injury (or pain) can be a slippery slope. Often times, people will approach me saying "my XYZ hurts. What should I do about it?" First, let me start by saying that I'm not an Orthopedist, a physical therapist or a chiropractor. I simply work in an environment in which people have a pretty high injury risk if they're not being careful, and I've had the opportunity to rack the brains of some very intelligent people who are much more qualified in this area than I am.

Here are some safe approaches to dealing with a painful or injured area without losing your precious gains that you've worked so hard to achieve:


  1. Get assessed! This is the number one, without a doubt, biggest priority. So many people put off going to a physical therapist or chiropractor for one reasons or another. Perhaps they're afraid of what a doctor will say, or they're just too stubborn. Alternatively, they'd prefer to deal with the pain on their own, and they exacerbate their symptoms. Often times, problem areas are a pretty quick fix, assuming you see the right therapist. Finding out what muscles are weak or under-active will be helpful in preventing other similar injuries down the line.
  2. Prioritize corrective exercise. I hear so many people complaining about pain, but yet no one wants to do anything to fix it. Instead, they will pop a couple Aspirin and hope it'll disappear on its own. Sorry to rain on your parade, but that won't work in the long term. Where there is pain, there is dysfunction. Injuries are very rarely caused by one isolated incident, but, rather, the culmination of months (or years) of bad movement patterns. Pain happens when your body says "Whoa, something needs to change. I can't keep working like this." Breathing drills are absolutely important to bring your body back to the parasympathetic nervous system. Correcting your posture will improve your mechanics. Strengthening weak muscles will lead to more optimal movement patterns. Do your shoulder stability work, core strengthening, and hip stability exercises. Without consistency, your symptoms will persist.
  3. Only lift with perfect technique. This goes hand-in-hand with number two. Don't put more weight on the bar than your body is ready to handle. Injuries happen when you compensate.
  4. Don't train painful movements. Figure out a way to work around the pain. If squats are painful when you pass parallel (full knee flexion), try doing box squats or lunges for a while. Are front squats bothering your wrists? Stick with back squats. When a movement causes you pain, you will, subconsciously and consciously, move differently. Your body is going to reflexively shift weight away from a painful area, so you might place more weight on one side of your body than the other, or recruit muscles you shouldn't be recruiting.
  5. Focus on other areas of your body. While your ankle is bothering you, you may use this time to work on your pull-ups and your bench press. Try adding some gymnastics movements into your routine. If your shoulder is injured, now's the time to improve your sprints and increase your back squat. Spend time strengthening the uninjured areas, so that you can still stay on top of your game.
Injuries are frustrating, but they're not the end of the world. If you take all of the proper measures to treat them, you can be back to training normally in just a few weeks.

With an injury, the worst thing you could possibly do would be to ignore it and just hope it gets better on its own. Be proactive and help yourself! Remember, we all experience injury at one point or another, and you can still make progress while you're injured. Always listen to your body and train safely.

Wednesday, July 1, 2015

Where Does Your Knee Pain Really Come From?


The knees are the largest joints in the human body. Unfortunately, these large joints also seem to be an even bigger area for pain and injury. In the U.S. alone, surgeons perform around 700,000 knee replacements annually--that's a lot of bionic knees! Other knee-related injuries include ACL tears, MCL tears, patellar tendon tears, patellar tendonitis, dislocated patellas and osteoarthritis. In my opinion, many of these surgeries or injuries are easily preventable. With the proper training protocol, you can avoid knee pain and inevitable surgery down the line.

We use our knees for a lot of different activities from walking and running to jumping, squatting and lunging, and therefore they withstand a lot of impact. It is incredibly important to prioritize solid movement patterns to avoid any further stress.

I should warn you, that this post will be fairly heavy in anatomical jargon. Brace yourself.

The "knee" covers an area of four bones: the femur, the fibula, the tibia, and the patella. As a hinge joint, the knee can only flex and extend. Though its actions are simple, the muscles around it are vast and complex. Some of the important muscles that directly help the movement of this joint are the hamstrings complex (semimembranosus, semitendinosus, and biceps femoris), the quadriceps complex (vastus medialis, vastus lateralis, vastus intermedius, and rectus femoris), the calf muscles (gastrocnemius, popliteus, tibialis anterior, and the peroneals). If you feel overwhelmed with the laundry list of muscles I just mentioned, fear not! I will elaborate.

Now, we need to remember that the body acts as a chain. One part of the body reacts to the feedback of another part. What are the two major joints near the knee? If you guessed the hip and the ankle, high five! We cannot just consider the knee in the case of knee pain, but rather, we must think about how the surrounding joints are compromising the integrity of the knee. If you have poor hip or ankle stability, the knee is going to work a lot harder to compensate for the lack of stability elsewhere.

Let's start from the ground up, at the ankle. The ankle can plantarflex (point), dorsiflex (flex upwards), invert/supinate, or evert/pronate. Check your feet. Are your arches exceedingly high or collapsed? What happens to them as you squat or jump? Ideally, we want to strive for a perfect balance between pronation and supination when standing. Both of these two movements are completely natural ankle movements when walking or running, but we do not want either in excess.

If, for example, you squat and your ankle collapses (pronates) completely, you will likely experience some collapse of the knee with it. The muscles on the inside of your leg (adductors) are over-active or tight, while the antagonists (abductors) will be lengthened. Do you often feel pain in your IT bands? Well, you may fit into this category of people. Your IT bands may be tense because they're working really hard for some other guys. Think about how this position is going to effect the ligaments and tendons in your knee!

Look at the relationship between his knees and ankles in the squat.
Conversely, if you drive your knees out too much and shift your weight laterally (supinate) your feet, the opposite will happen. Your adductors are going to be lengthened while your abductors will work over time. I was one of these people. The lateral areas of my knee always caused me pain, because I was nearly rolling my ankles as I squatted.

Obviously, the ankle position will effect the knee and hip mechanics, and vice versa.


If one lacks sufficient strength in the gluteus medius and the peroneals, the lifter will, again, revert to a valgus (collapse) of the knees. Weak gluteus maximus will result in an abuse of the quadriceps complex, which is going to pull onto the patellar tendon for dear life. Put more simply, if your glutes aren't strong enough, your knees are going to pay the price.

As I said, we want to maintain a balance in how we shift our weight as we move. Too much outward shifting of the hip or ankle is just as counter-productive as shifting too much weight inward. True strength comes from a balance.

Some of these inefficiencies may be a matter of learning. You might not understand what a proper squat should look like, and there for cueing and repetition will go a long way. If cueing has not helped, then you need to follow a strengthening and mobility routine. The exercises I've listed below will be tremendously helpful.

Now that we've made it through the meat of this article, it's time to learn how to correct these faults. Figure out where you lie on this spectrum of movement dysfunction, and correct your mechanics as necessary.

Once you've mobilized, the next step is to strengthen the targeted muscles:
Where there is pain, there is weakness and dysfunction. You don't have to "accept" being in pain. Strengthening the hip and ankle muscles are vital in perfecting your mechanics and preventing unnecessary stresses on the soft tissues of the knee. Pay attention to those stabilizers and you will save your knees for many years of heavy lifting to come.

Friday, May 29, 2015

How Bigger Hamstrings Will Improve Your Athleticism and Prevent Injury


Let's talk about everyone's favorite chain: the posterior chain. So many songs have been written about it, but yet, some people oddly neglect to sufficiently train the glutes and hamstrings.

With this overwhelming abuse of the quadriceps complex, it is important that lifters prioritize isolation of the hamstring muscles to balance out the discrepancy in strength. Hamstring strength can play a role in improved power output, running economy, and may even reduce the risk of injuries like ACL tears.

As much as I love squats (and believe them to be one of the most beneficial exercises), the squat does not actually activate the posterior chain as much as many people think. In fact, many people squatting are quad-dominant, and under-utilize the gluteus maximus.

Before I elaborate, we need to review a little bit of anatomy. The muscles we refer to as the "hamstrings" are actually three separate muscles: the biceps femoris (which has a long head and a short head), the semimembranosus, and the semitendinosus. These two joint muscles work together to flex the knees and extend the hips.


Now that that's out of the way, we can talk about how these muscles affect performance. Since they act as hip extensors, strong hamstrings are going to be crucial for a high jump and a fast sprint. A 2007 study on sprinters concluded that "[...]the muscles mainly responsible for forward propulsion in full speed sprinting are the hamstrings, the glutaeus maximus and the adductor longus. The hamstrings are singled out as the most important contributors to produce highest speed levels." Essentially, an athlete with well-developed hamstrings will be able to horizontally accelerate much faster than an opponent with weaker hamstrings. Each stride will allow him to generate greater hip extension, getting more power as he straightens his legs. While quadriceps strength is necessary, it is the posterior chain that allows him to push harder off of the ground.

Similarly, another study found that runners with a smaller hamstring-to-quad ratio, meaning that there was not as big of a strength/size disparity between the two muscles, had a better running economy. This balance between the quadriceps and the hamstrings allowed the runners to be more efficient in their cadence. It was deduced that "runners should consider implementing hamstring exercises to improve their f-H:Q (hamstring to quad) ratios."

Usain Bolt has some serious hamstring pump.

The muscles activated in jumping are very similar to those we recruit in sprinting. While sprinting is unilateral, jumping is a bilateral movement. The extension of the hips, knees, and ankles, however, is much the same.

A four week study on males (with no strength training experience) found that the Nordic hamstring exercise (which I will show you later in this article) "[produced] favourable neuromuscular adaptations for the possible prevention of hamstring injuries while enhancing performance in athletic, untrained males." Using this exercise, on average, their vertical jump heights increased by about 6.3 cm in a month! That's pretty substantial. Granted, these are untrained individuals, but athletes could still reap some benefits from building the hamstrings.

I am a firm believer that a stronger, all-around, individual will be more resilient to injury. There is a decent amount of evidence to support the idea that hamstring strengthening can prevent the incidence of hamstring pulls, ACL tears, and other such injuries.

Askling et. al. tested hamstring injury in high-level soccer players. He put the players on an eccentric hamstring strengthening protocol 1-2 times a week for 10 weeks. "The results showed that the occurrence of hamstring strain injuries was clearly lower in the training group (3/15) than in the control group (10/15). In addition, there were significant increases in strength and speed in the training group." So the players got stronger, faster, and stayed injury free. What more could an athlete or a coach want!?

Here's the part you've been waiting for--the exercise section:


  1. Russian leg curls
  2. Good-mornings
  3. Hip extensions (add weight if necessary)
  4. Single leg RDL
  5. Barbell hip thrusters
  6. Stability ball leg curls 
  7. Single leg sliding leg curl (advanced)
  8. Slow eccentric RDLs
  9. Reverse hypers
  10. Stiff legged deadlifts


Not only will you have a better-looking rear-end, you'll be stronger, faster, and more injury resistant. Sounds like a win, win, win to me. Build those posterior chains!


Thursday, April 23, 2015

The Ab Exercise You're Doing Incorrectly

You work these muscles 23,000 times a day, on average, but chances are, you're using them incorrectly. In our sleep-deprived, high stress lifestyles, many of us are breathing incorrectly several thousand times a day, everyday over the course of our lives.

The core musculature like the rectus abdominis, diaphragm, internal and external obliques also allow for efficient breathing. If you're not breathing correctly, the sequencing and integrity of all of these muscles will be compromised. Your hours of "ab circuits" will all be for naught.


In my opinion, emphasis on proper breathing while training (or just normal daily function) is paramount. Here's why:
  • Improved intra-abdominal pressure (core stability)
  • Prevents facilitation (overuse) of trapezius, scalenes, and sternocleidomastoid muscles
  • Teaches proper diaphragmatic activation
  • Proper core sequencing for all activities
  • Improves ability to return to parasympathetic nervous system (reduce stress)
  • Better recovery and reduced risk of injury
Intra Abdominal Pressure

In any big lift like a squat, bench, or deadlift, creating sufficient intra-abdominal pressure is mandatory for safety. To quote Dr. Yuri Verkohansky, "Without breath-holding, far greater pressure  is exerted on vulnerable structures of the lumbar spine, in particular the intervertebral disks and ligaments." Basically, if you're not breathing correctly, you risk herniating a disk or placing additional shear forces on your vertabrae. I see far too many lifters getting under (or over, in a deadlift) a loaded barbell without sufficient abdominal bracing.

Shoulder Stability

If you breathe through the neck and chest, as many people I interact with do, your shoulders are going to remain in a shrugged or elevated position. This means the shoulders are unstable and you will have an increased risk for rotator cuff tears, dislocations, pectoralis major/minor tears, or labral tears. If the muscles normally used to stabilize your shoulder, like the serratus anterior, are forced to help you breathe instead of performing their primary roles, your shoulders are in danger.

Hip Stability

Similarly, the stability of the hips will also be compromised without proper breathing. Muscles like the quadratus lumborum may become overactive if the rectus abdominis or external obliques aren't firing correctly.

Conditioning

If you're training your aerobic energy system, which requires oxygen to function, and you're not getting sufficient oxygen into your lungs, guess what? You're not going to be able to run/bike/swim as hard or quickly as you would otherwise. Shallow, chest breathing is not optimal for oxygen uptake. Rather, deep breaths through the diaphragm are ideal.

Recovery

Chest and neck breathing is the result of the sympathetic,"fight or flight" nervous system taking over, while diaphragmatic breathing brings the body back to the parasympathetic "rest and recover" nervous system. Remaining in the sympathetic nervous system = increased recovery time. If you're trying to train hard and improve performance, you need adequate recovery.

Have I convinced you just how important your breath is to all facets of training and general health yet?

Now, take a moment to monitor your own breaths. Are you breathing through your mouth? Does your chest expand as you inhale? Do your traps constantly feel tight?

The ideal way to breathe is through the nose, with the tongue on the roof of the mouth (which will encourage diaphragmatic expansion) and expand the belly and the ribcage with each breath. Your ribcage should expand 360 degrees with each inhalation. We want lateral expansion of the ribs at the same time as it expands forward and backwards.

Now, I'm going to give you some tips on how to improve your breathing habits. Here are three of my favorite "core" and breathing exercises:


  • Crocodile Breathing

    • Lay down on your belly with your hands crossed in front of your head
    • Take a big breath in through the nose with the tongue on the roof of the mouth
    • Focus on expanding the stomach and the lower back as you inhale
    • Exhale slowly and completely through the mouth


  • Manual Resisted Breathing

    • Lay on your back and have a partner sit next to you.
    • The partner should place his/her hands on your stomach
    • As you inhale through the nose, keep the tongue on the roof of the mouth
    • Partner provides gentle resistance to your diaphragm during inhalation
    • Hold your breath for 1-2 seconds at the top
    • Exhale slowly and completely through the mouth


  • Kettlebell Breathing Drill

    • Place feet hips distance at a right angle against the wall
    • Hold a light dumbbell or kettlebell on the belly (10-15 lbs)
    • As you inhale, focus on pressing your stomach up against the weight and expanding the rib cage
    • Count to ten as you inhale, pause at the top, and count to ten as you exhale through the mouth


These are three fantastic exercises to bring your body back to the parasympathetic nervous system and find some peace from your chaotic day. If you take these simple steps to improve your breathing, I can guarantee you that the results will be profound. You will improve your mechanics, become more stable and mobile, and, most importantly, inch towards a more stress-free lifestyle.

Just breathe!

Thursday, April 9, 2015

Behind the Neck Exercises: Do You Need Them?


For every exercise, there's an equal and opposite, behind-the-neck variation. Behind-the-neck lat pull-downs, pull-ups, push presses, strict presses, are just a few examples of exercises I've seen people try to do behind their necks. Perhaps they're trying to hit the same muscle groups in a new way, or target different muscles altogether. Regardless of the reason, I am not generally a fan of the behind-the-neck training club.

Given the overwhelming number of shoulders stuck in internal rotation and spines stuck in kyphosis for the average desk-worker or sedentary individual, many people already come into the gym with a slew of shoulder restrictions and postural limitations. The shoulder is the most mobile joint in the body. Because of the huge range of motion in the joint, many people have poor stability overhead. Men and women alike suffer from scapular flaring (see below) as a result of lifestyle habits and poor posture.
She may look like she's at peace, but she's forcing her shoulders into an unstable position!
It is often difficult enough for someone to maintain shoulder stability in the traditional variations of a pull-up or strict press. Now, once you start trying to do these movements behind the neck, you're just reinforcing a dangerous position that may lead to pain or injury in the future.

For starters, let's analyze the neck position of someone doing an exercise behind his neck.

If you've read my previous posts, you understand that the position of the neck impacts the position of the rest of the spine. This particular...gentleman is obviously very muscular. Despite this, however, his cervical spine (neck) is flexed, and he is reinforcing the dreaded forward head posture ("chicken head" posture). This exercise may be counterproductive for him as it could potentially lead to some neck pain down the line.

Now, let's move on to what might be happening to the shoulders in a movement like the lat-pull downs in the above photo.

As the result of the neck position, (because the human body works as a chain) his shoulder stability is also compromised. Ideally, his scapula should slide down the ribcage as he pulls the bar towards his traps. However, if the shoulders are internally rotated, the shoulder blade tilts forward and slopes off of the ribcage.

Many Olympic lifting coaches teach jerks or presses behind the neck, because it enables the athlete to keep his torso more upright in the dip. Unfortunately, for most, this might also damage the integrity of the shoulder position in order to maintain a vertical torso.

In an ideal situation, a behind-the neck exercise might be beneficial for an athlete. Unfortunately, the shoulder position is often compromised. If you have had shoulder issues in the past, you more than likely lack mobility or stability in the shoulder joint, and these types of exercises will just exacerbate your issues.

Unless you are certain you can sustain an ideal position in a behind the neck exercise, perhaps your routine is better off without them!

Friday, February 13, 2015

Breathe Your Way to Bigger Lifts


Check yourself: as you read this, are you taking deep, full breaths, or is your breath shallow and inconsistent?

I've found that my clients have the tendency to forget to breathe as the they lift. They're getting ready for a max back squat and they step under the bar with a completely unstable abdomen.

You take, on average, over 20,000 breaths per day, yet somehow, in today's stressful society, breathing is not always automatic. When people are anxious or preoccupied, they may forget to breathe, or their breathing may not be of adequate depth.

The respiratory system, courtesy of www.philschatz.com.
Now, above I've placed a photo of the respiratory system. As you can see, there is a lot going on there. Many people who are stressed or are in the sympathetic nervous system response (fight or flight), will breather primarily through the neck and chest--this is usually easily visible. Someone who is calm and in the parasympathetic nervous system should breathe through the diaphragm, and you will note that their bellies and lower ribcages will expand as they inhale.

The respiratory system obviously provides our brains with oxygen, but it also helps to stabilize our abdomens. When we inhale, the diaphragm contracts and presses up against the lungs, and as we exhale, the diaphragm relaxes.

A proper diaphragmatic breath helps us create intra-abdominal pressure. On a compound movement like a squat, deadlift or bench press, maintaining that intra-abdominal pressure is imperative for safety of the spine and maximal power output.

He may be cute, but we certainly don't want to emulate his physique!

My friend Wileen, a Licensed Massage Therapist and practitioner of NeuroKinetic therapy, gave me this wonderful example--she said that without sufficient intra-abdominal pressure, the body is much like the Slinky Dog in "Toy Story." Essentially, the abdomen will be soft and unprepared to handle a sufficient load.

Would you rather lift with a body like that of Slinky Dog or that of Buzz Lightyear? I have my money on Buzz Lightyear any day of the week.

A heavy lift requires a substantial amount of tension in the body, from the feet, all of the way up to the torso. Without that necessary rigidity, the risk of injury is exponentially higher, and the amount of energy we are wasting comes in droves.

A strong core creates bigger lifts. We can't optimize the strength of the thorax without proper spinal bracing via the breath, so therefore, a stronger breath means more weight on the bar! You follow me?

Now, down to the nitty gritty. You may be wondering how you should breathe on these big lifts. There is a technique that many lifters employ called the Valsalva maneuver. This is just one way to breathe to take advantage of the intra-abdominal pressure. I will warn, though, that anyone who has a history of high blood pressure should not breathe this way, as it does raise the blood pressure even more. Ideally, we want to inhale through the nose, which facilitates a full contraction of the diaphragm. Then, we should engage the abdominals. I tell my clients to imagine like I'm going to punch them in their stomachs. Once they have that down, they may begin the movement. During the hardest part of the movement, or the end of the concentric phase (think of standing up on a deadlift or squat or locking out an overhead press), they should forcefully exhale through the mouth. If they are doing a set with multiple reps, they should repeat this before each repetition.

This photo of the Valsalva maneuver in action demonstrates an iron clad core. As you can see, the airway is cut off and the diaphragm is contracted abdominal cavity expands. This individual is ready to move big weight.

Many people use lifting belts to enhance this effect. The belt acts as somewhat of a tactile cue to improve that core stabilization. I won't get into that too much today, though, as that is enough material for an entirely new post.

As you can see, the way you breathe has a profound impact on your performance, both in and out of the gym. It's is extremely important to learn how to maintain intra-abdominal pressure throughout a heavy lift for both efficacy and safety.

Friday, February 6, 2015

Your Hips Don't Lie...Or Do They?


We'd all like to move our hips like Shakira (or maybe that's just me). One thing I've noticed, though, in many of my clients, is that the cue "hinge at the hips" usually raises confusion. The fact is that many people I've met do not know the difference between bending at the hips and bending at the waist. I am to put an end to this gray area.

Whether you're picking something up from the floor or preparing yourself for a deadlift PR, it's crucial, for the longevity of your spine, to learn how to properly load the hips.

This guy knows how to drop it low.
Take a look at the photo: which one looks safer? If you were going to pick up your dining room table while moving into a new house, what do you think would be the safest and most mechanically optimal way to do so? Which position would allow someone to efficiently deadlift upwards of 500 pounds?

I'm guessing (and hoping) you picked the photo on the left.

The photo on the right will place excessive shear force on your intervertebral disks and prevent you from properly engaging the powerful forces that are the erector spinae, the gluteus maximi and the hamstrings complex.

Look at that hip hinge...
To help clients learn to hinge at the hips, I have them lift up one leg and place a hand in the crease of the hips. Once they've established this placement of the hands, I ask them to keep their hands there and try to bend and squeeze their hand with their hips as they push their butts back towards the wall. This tactile cue allows them to feel how they should load a weighted movement.

You'll know you're hinging at the hips properly when you feel a nice stretch in your hamstrings at the bottom of the movement--this allows us to use that elastic capacity to extend the hips as we stand.

You should lift both a laundry basket and a barbell in the same manner: loading the hips and bracing the core. When used properly, the hip extensors (like the hamstrings and the glutes) can produce an incredible amount of power. When misused, we run the risk of injury and we are limiting the full potential of the posterior chain.

Your glutes are (arguably) the biggest muscles in the body, so why wouldn't you want to take full advantage of them while lifting heavy weight?

If you want to learn to move like Shakira, the first step is to understand how to prime the hips for movement.